Tips & Tricks 
General Recipe Hints
These are some basic facts applying to all recipes.
-
Most of the recipes here can be put back into the freezer after processing, and remain scoopable for days without processing them again. Plan ahead accordingly.
Another advantage of such recipes is you can do the processing during the day, and enjoy your ice cream in the evening or at night without disturbing anyone with Creami noises.
Or, if you prefer soft-serve consistency, you can dig in immediately.
-
Ingredient amounts fit the 680ml (24oz) container size of the Creami Deluxe. For the base model and the Swirl, scale the recipes by using ⅔ of all ingredients (66%).

Creami Don'ts
Avoid these things and methods:
-
Do not listen to claims like "but it works for me, for years now." Your freezer might have a temperature lower or higher than the other person's, your kitchen temperature might vary greatly according to local climate and seasonal changes, your paddle might be more worn down that the other person's, your protein powder might not have the additives that theirs has, and so on.
-
Do not use a milk frother to mix your bases. These things do not disperse powders as effectively as an immersion blender or blender (because it's not their job), and also add a lot of unwanted foam (that's their job).
The risk of dry ingredients clumping is way higher, as is that of solids sinking to the bottom (ingredient separation into layers).
-
Do not skip blending your chunky ingredients. A smooth base is just safer to spin in general. The Creami is not a blender, it is a rotational scraper of ice in the middle of a slushy and rock-hard consistency.
-
Do not freeze your tubs with the lid off, the pressure from the ice shield that forms at the top of your base can damage the bottom of your container (warping and cracking, expanding ice seeks the path of least resistance).
-
Do not freeze your bases less than 24h, unless you know from a previous scrape test your recipe is OK with less, or you freeze pre-chilled bases.
-
Do not process bases frozen outside the designated temperature range of -12°C to -20°C.
-
Do not soften (thaw) your frozen tubs without checking whether that is needed at all, see scrape test. By default, process immediately after removing from the freezer.
-
Do not run your tubs under hot water before the first spin, see Handling of Icy Sides & Bottom.
-
Do not skip flattening the hump.
-
Do not run a cycle without the gasket placed in the lid (i.e. do not forget to reinsert it after cleaning). If you do, you might face consequences like nasty spills, or worse the tub loosing grip in the outer container and grinding down the lid, ultimately causing a catastrophic failure.
-
Do not spin non-level surfaces (see right above). "Non-level" refers to both an uneven or slanted surface of your base. Always flatten left-overs you intend to process again, before putting them back into the freezer.
-
Do not process left-overs from the freezer using the Respin mode. Instead, use the same mode you used originally.
However, for bases using a recipe with enough anti-freeze agents in them, this is not necessary. They can be scooped either directly out of the freezer, or after a short period of softening on the counter (the same is true for many commercial ice cream brands).
-
Do not add raw pineapple to your uncooked bases when they contain dairy, since that quite likely causes your ice cream to taste bitter. Since the Creami is very often used with cold bases, this generic problem can appear more frequently than in "classic" ice cream making. Complete inactivation of the responsible enzyme requires temperatures around 80°C (176°F). Canned pineapple is safe.
The science behind it is an enzyme called bromelain, which can react with the proteins (casein) in dairy products like milk or yogurt, causing them to break down into bitter-tasting peptides. Bromelain is found primarily in pineapple, but kiwi, mango, and guava contain trace amounts of it, too. Papaya contains a similar enzyme called papain, with the same consequences.
About 'Simple' Recipes
Generally, my recipes are optimized for flavor and texture, not for the number or type of ingredients.
If you use a kitchen scale and immersion blender, this workflow makes the number of ingredients not that important:
- Put the tub on your scale and weigh the wet ingredients one after another using TARE.
- Do the same for the dry ones into one additional bowl, and mix them well with a spoon.
- Then pour the dry stuff into the wet stuff and blend away.
- You now have to clean up a bowl, a spoon, and the immersion blender's shaft.
Once you have this workflow down, and fetch the needed ingredients beforehand, preparing a tub takes at most a few minutes.
Nonetheless, recipes tagged as Simple have a reduced amount of ingredients, which are also 'non-exotic' i.e. sourceable locally. For some, like lecithin, you might need to go to a Reformhaus or Drogeriemarkt in Germany, or a specialty shop for baking or brewing supplies. If in doubt, just shop for them online — my recipes have names of brands that are available in Germany.
Essential Ingredients & Tools
Also, some ingredients and tools I consider essential for ice cream making, which you might not have encountered in cooking or baking yet. These are:
- Glycerin (E422, VG) to get a scoopable, freezer-stable ice cream.
- Soy or Sunflower Lecithin for recipes that contain nut butter or other unusual amounts of fat. The more 'exotic' options are E473 and E471.
- Xanthan and guar gum. Where you encounter Salty Stability as an ingredient, you can replace it by 1.5g guar, 0.5g xanthan, and 0.5g salt (for a standard 15g dosage, scale other amounts accordingly).
- Skim Milk Powder (SMP) and Inulin to provide body (solids), especially to low(er) fat recipes.
- Dextrose, in case you want to replace sugar alcohols (erythritol, xylitol, etc).
- A sturdy (metal) ice cream scoop.
- Extra containers for having a selection of prepared flavors. Two is not enough for most people, many settle on 6 to be able to prep a full week's worth of creamis.
- Pint cozies assuming you do enjoy your ice cream spooning directly out of the container. They prevent premature melting, and cold hands. Get ones with a handle (formed like a coffee mug).
- An immersion blender or stand mixer — do not use a milk frother, you want to blend your base, not add foam that you need to get rid of later on by hours of waiting.
- A digital kitchen scale. Prefer one that has a 0.1g precision, those are also typically updating faster, without undue delays of one or more seconds.

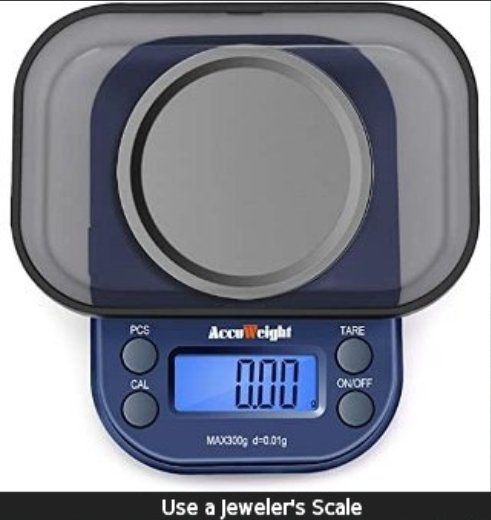
- Consider also getting a jeweller's scale (0.01g precision) for very small ingredient amounts, where a normal kitchen scale will fail you. They are cheap, in the 15–30€ range, and so small they're easily tucked away in a utensil drawer.
And look out for alternatives for ingredients you don't have — they are given on the same line as the ingredient they replace, or mentioned in the introduction above the ingredient list.
Ingredient Replacements
Finally, here are some replacements for widely used ingredients, in percentages of the original weight. These ratios are keeping the PAC / POD value as close as possible to the original ingredient:
- Erythritol → 40% Honey + 60% Glycerin
- Xylitol → 75% Honey + 25% Glycerin
- SweEX (E’ol+X’ol 3:2) → 133% Allulose or Dextrose
- SweEX (E’ol+X’ol 3:2) → 55% Honey + 45% Glycerin
- SweEX (E’ol+X’ol 3:2) → 50% Allulose + 20% Agave syrup + 35% Glycerin
- Trehalose → 55% Dextrose or 50% Honey
- Vegetable Glycerin → 350% Lactose (15g VG → 53g lactose)
- Alcohol 40 vol% → 80% Glycerin — This is mildly sweet where the alcohol is not.
- Alcohol 40 vol% → 300% Lactose — This is mildly sweet where the alcohol is not.
- Light corn syrup (32 DE) → 80% rice syrup or maple syrup
- Sugar (Sucrose) → 55% Isomalt (E953) + 45% Fructose (PAC 107; POD 104; GI ~10)
- Allulose → 50% Fructose + 50% Inulin (PAC 106; POD 90; GI ~10)
Where the replacing weight differs, the usual "fill to MAX line" will take care of that.
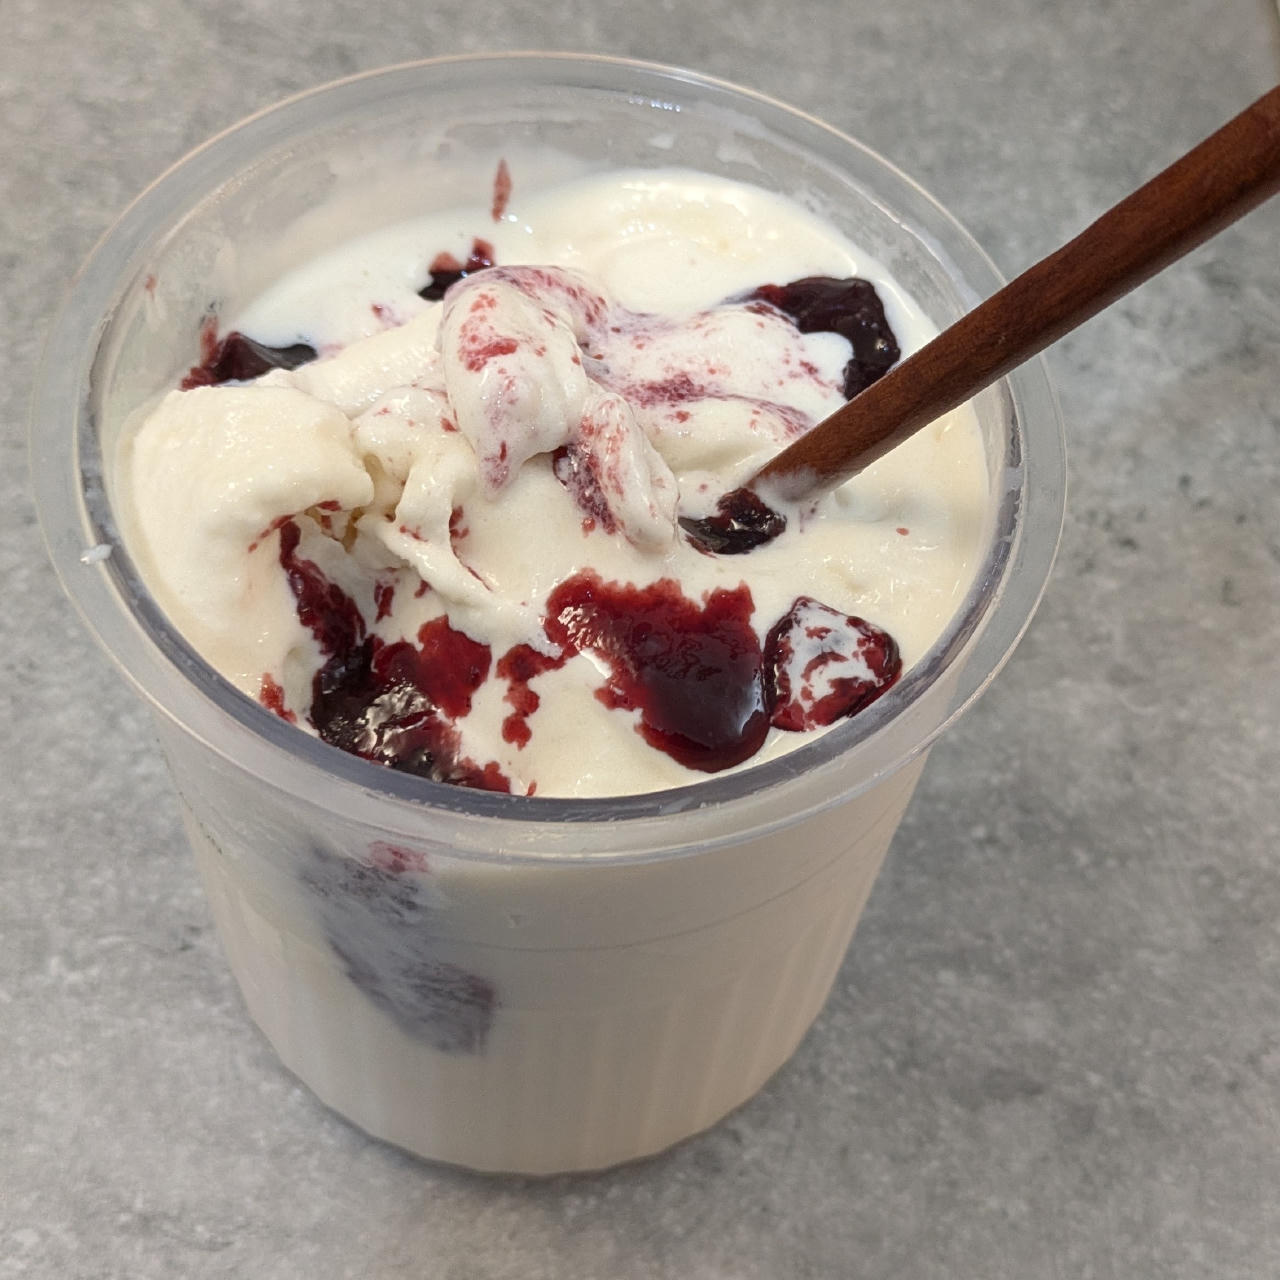
Folding in Swirls
If you have soft swirls that are not frozen (and aren't supposed to freeze), you cannot use the mix-in mode.
Best instrument to do that within the tub is a chopstick. It requires a swirl mix that is sufficiently fluid.
-
Make several small holes in your processed base, using the blunt end of a chopstick. The base should not be too soft for this. Place one hole in the center and 6 to 8 holes in a circle, down to the bottom.
-
Then fill those holes with the swirl mix, and use the pointy end of a chopstick to carefully fold the base and the swirl into each other, without really mixing.
-
This is best done by slowly moving the chopstick in a circle, sticking it diagonally into the base, while also slowly turning the tub until you did a full circle.
-
Refreeze for at least a few hours.
You may also consider to transfer your processed ice cream into a storage container, and layer it with your swirl mix. You automatically get swirls while scooping it out again. This of course requires you have a scoopable base that can be refrozen without processing again later.
Regular Cleaning is Key
Regular cleaning ensures continuous enjoyment of your creamis, and ensures the machine operates under the best conditions, especially when it comes to a strong paddle / rod connection.
Using a Dishwasher
The manual might state everything is dishwasher safe, but generally plastic ages faster when exposed to the harsh chemicals and higher heat in a dishwasher. Cleaning by hand, if you do it regularly, is over in a minute or so.
After you're done with processing a tub, clean the tip of the rod with a damp cloth, instantly and every time. Disjoin and drop lid and paddle into your (shallowly) filled sink, so they're submerged. That gives you ample opportunity to dig into your freshly made creami, without residue drying up or congealing.
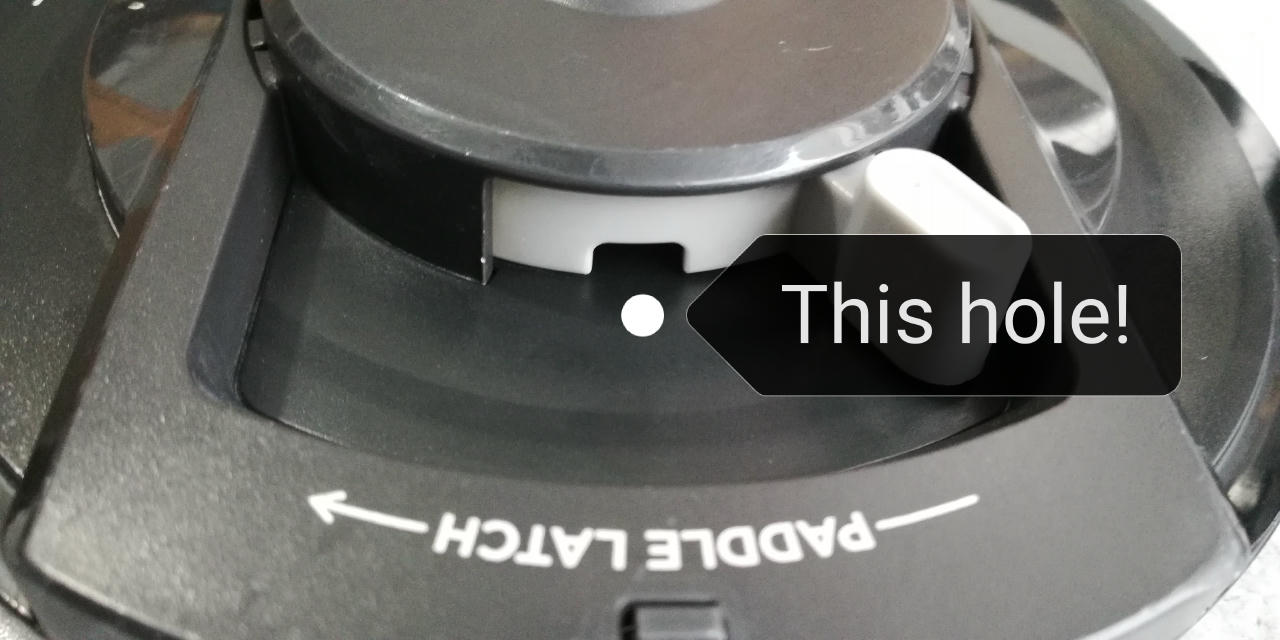
Later, clean the lid by lifting it out of the water and shaking it horizontally, repeating the submerging and lifting+shaking cycle several times. You can also hold it under the running tap, the good hole for running water through the lid is the rectangular one in the lever.
Finally, shake every drop of water out of the lid, and let it dry in a rack. Keep a firm grip when doing that (don't drop the lid).
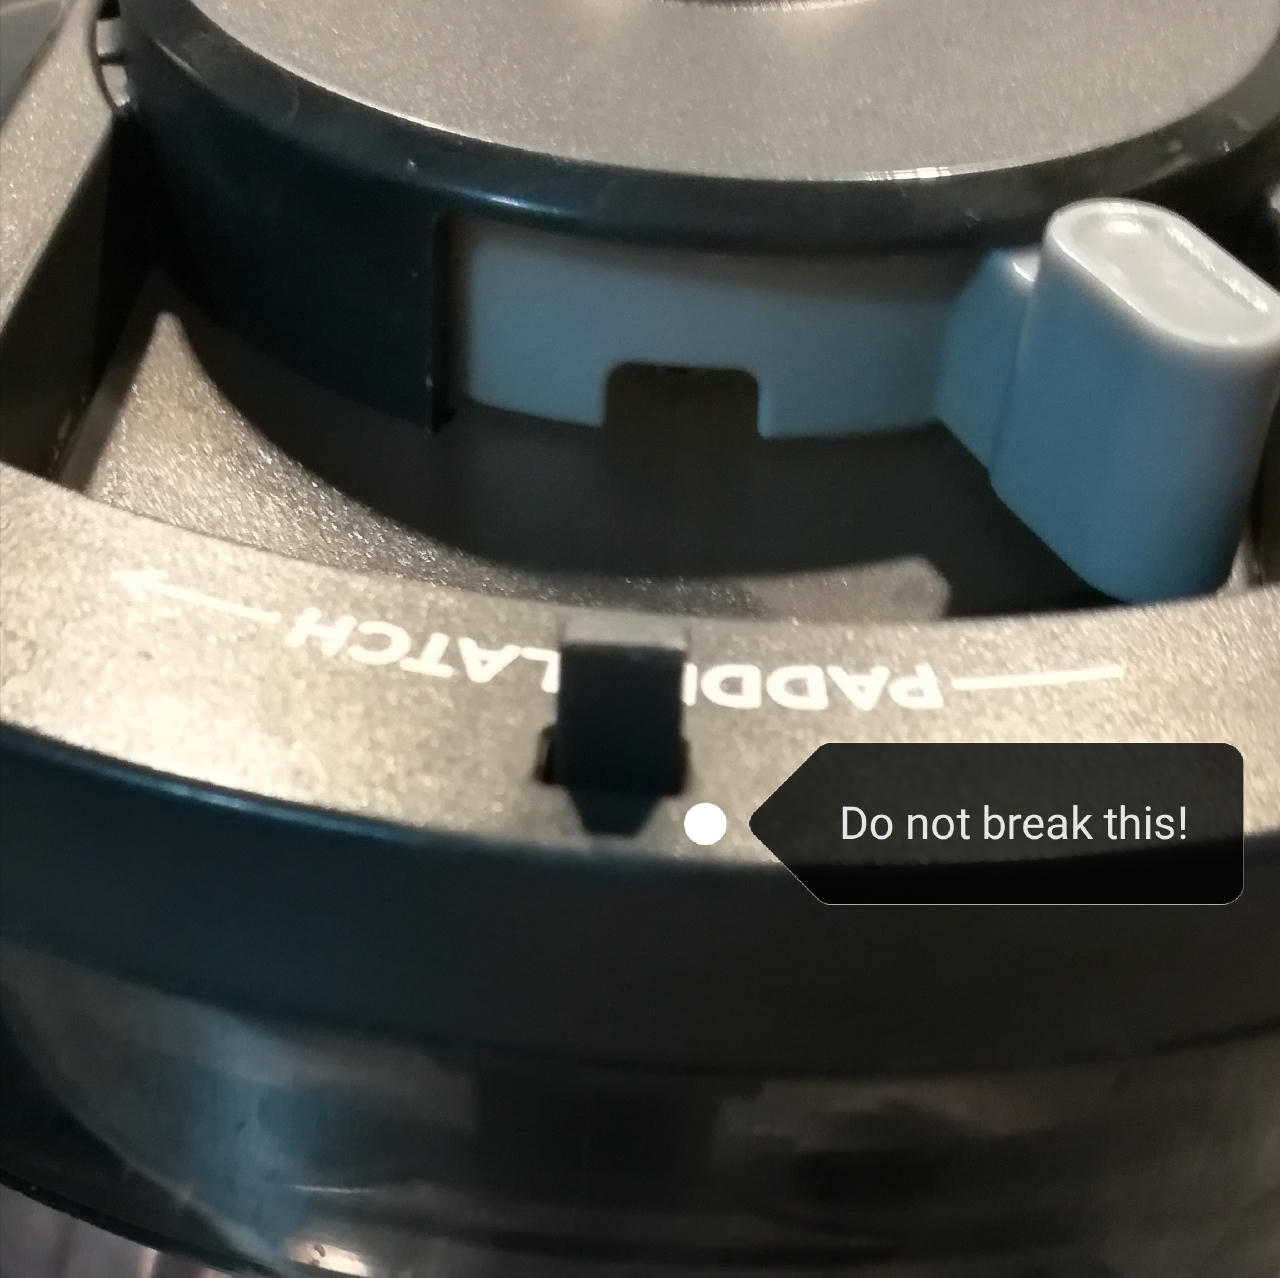
Also, take out the gasket from time to time (at least once a month), and clean it and under it. When ice cream overflowed the rim, do that immediately. Do not overstretch the gasket when removing, cleaning, and putting it back. If you have problems removing the gasket, use a blunt instrument like the top end of a spoon to lift it up.
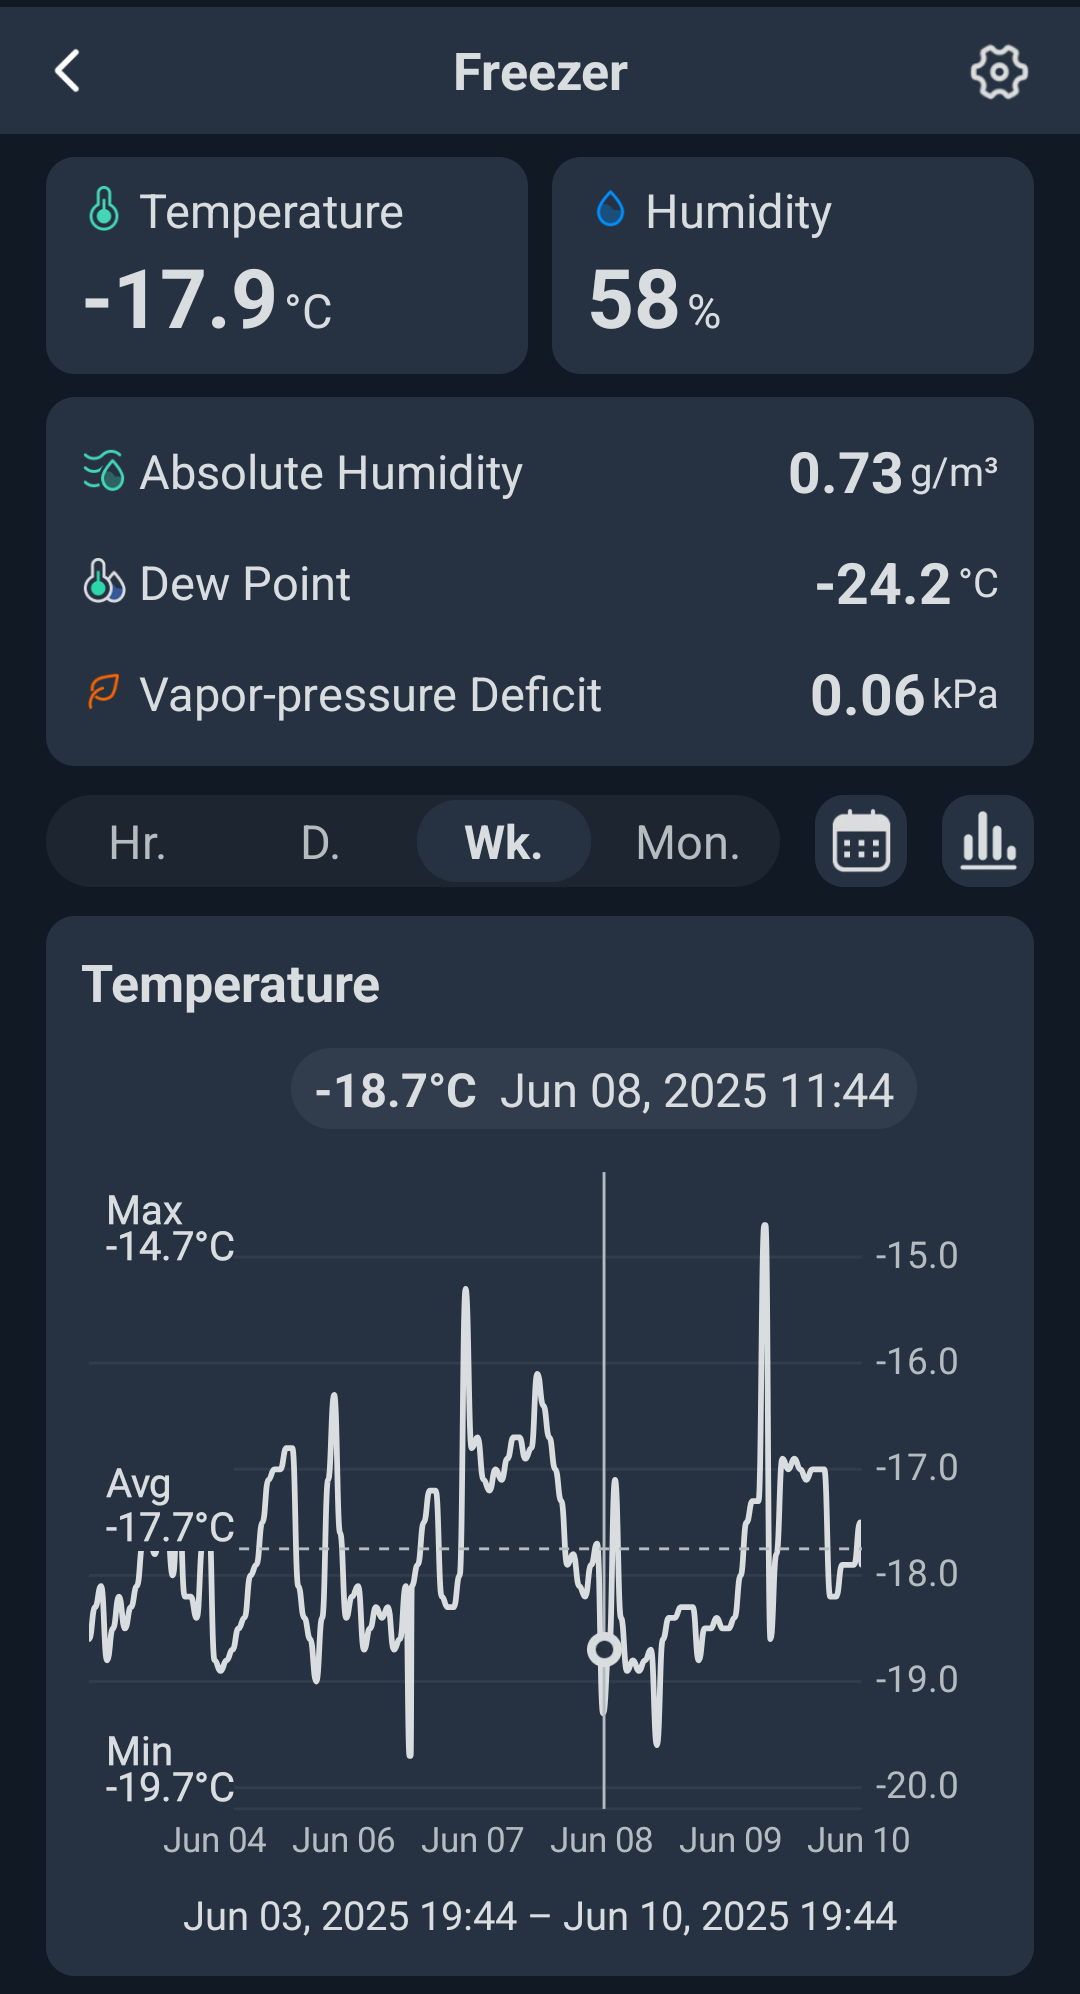
🤓 Remotely Monitor Your Freezer
Freezers, especially auto-defrosting ones, do strange things. If as a nerd you want to have an eye on that, and also know how cold your tubs come out of it, you can use a smarthome remote sensor that works via Bluetooth or Wi-Fi.
SwitchBot IP65 outdoor thermometer / hygrometer
Prepared Dry Mixes
Some of the recipes have 'Mix' in their name. These are partial recipes where you can weigh a mix of most or all of the dry ingredients in bulk.
You typically prepare enough for 4-10 tubs, making the overall process more efficient. Ingredients that only need small amounts are also easier to weigh, due to the upscaling for several portions.
When you make the final base, you weigh that mix, making it easier to use only a kitchen scale, most of which are not that precise with low amounts.
Choosing Processing Modes
Each mode has specific speeds and durations for the down / up movement, optimized for different recipe types.
Here's a breakdown of how speed and duration vary by mode:
- Ice Cream: Spins at medium speed to incorporate air, resulting in a creamy and smooth texture. Needs "normal" ratios of sugar and fat.
- Lite Ice Cream: Similar to Ice Cream, but optimized for lower-fat bases, with higher spin speeds and slower movement. Often used for milk alternatives and protein shakes.
- Sorbet: Fast rotational speed of the downwards movement to prevent large ice crystals from forming, creating a smooth, icy texture. Fast retraction at low rotational speed.
- Gelato: The same as Ice Cream.
- Smoothie Bowl (NC30x): The same as Light Ice Cream.
- Frozen Yogurt (Deluxe): The same speeds as Light Ice Cream, but 5 min total duration, split equally in half. This is the safest mode of all, but also induces the most heat.
- Milkshake: Downwards the speed of sorbet with the duration of ice cream, and a very fast retraction at low speed.
- Mix-in: A low-speed setting used to fold in mix-ins like chocolate chips.
- Respin: Timed like Mix-in, but at about 2.5 times the speed, to integrate crumbly spins or induce heat for softer consistency.
| Processing Mode | Time Down [s] | Down [rpm] | Time Up [s] | Spin Up [rpm] |
|---|---|---|---|---|
| Ice Cream | 60 | 1200 | 35 | 450 |
| Lite Ice Cream | 105 | 1790 | 40 | 1790 |
| Sorbet | 105 | 1790 | 35 | 450 |
| Gelato | 60 | 1200 | 35 | 450 |
| Milkshake | 60 | 1790 | 5 | 450 |
| Mix-in | 30 | 450 | 35 | 450 |
| Re-Spin | 30 | 1200 | 35 | 1200 |
| NC30x | ||||
| Smoothie Bowl | 105 | 1790 | 40 | 1790 |
| Deluxe | ||||
| Frozen Yogurt | 150 | 1790 | 150 | 1790 |
Detailed movement durations and spin speeds for different modes
(source: Dream Scoops • IngoCoffee's video)

Mode details for the 'Swirl'
(source: Reddit u/rodzlenz)
Scrape Test, Always
Always perform a scrape test before processing, to judge what mode fits the specific tub before you best, and whether you should leave the tub on the counter or in the fridge for 5 to 15 minutes to make it soft enough for processing ('soft' still means frozen here, just less so).
When soft enough, scrape down any hump that might have developed during freezing, to get a paddle-friendly flat surface.
Handling of Icy Sides & Bottom
The way a Creami processes your base means that the tub sides and bottom remain partially frozen, since the paddle can never touch the sides or bottom of the container, within normal operating conditions. It has to be that way, since otherwise you risk the whole base spinning as a block rather than being shaved down. The sides and the bottom with its grooves provide the grip for the block to stay in place, with only the paddle spinning.
To get rid of the icy parts, after the 1st (main) processing step, run cold tap water (20..25°C) over the container, tilted a little to the side and while turning it to treat the container wall fully. Do that for 15..30 seconds, depending on the consistency of the base.
Then, for already relatively soft bases, do a 2nd run on "Mix-in" to minimize the additional heat induced, otherwise perform a "Respin." You can also scrape down the sides with a spoon (upside of the spoon oriented towards the wall) or a stiff silicone spatula, to bring the icy parts to where the paddle can reach them.
If your ice cream gets too soft that way, put it back into the freezer for at least an hour. Once you made a recipe, you know how it reacts and can plan ahead accordingly.
Recipes with a PAC value of above 25 typically need a refreeze — see it as an advantage since you can spin a base during the day and enjoy it late at night without any noise pollution. And later on, any left-overs can be consumed directly out of the freezer, since they remain scoopable permanently.
💡 Make a Milk Shake
💭 If life gives you icy residue, make a milk shake.
The icy bottom often is not influenced by a scrape-down run and remains. Put it to good use by making a milk shake from the bottom half inch or so (≈1.5cm).
- Fill the tub to a third or half with your preferred milk.
- Add sweetener or flavor drops of choice, and possibly a dollop of cream.
- Froth it up with a blender, incorporating all of the ice cream.
- If necessary, use easily dissolved instant starch to thicken your shake clump-free.
- Pour into a long-drink glass.


We might eat out of the tub, but only babarians drink out of it. 😉

⛔ No Premature Thawing
It is not recommended to use hot water before the 1st (main) processing step!
You risk your machine since the frozen block can get loose and spin within the tub, with commonly catastrophic consequences — burn-out of the machine, shearing of the rod tip and paddle.